Trial Period or Updates Expiring? Email Trial ID to Support
Thank you for testing MillMage!
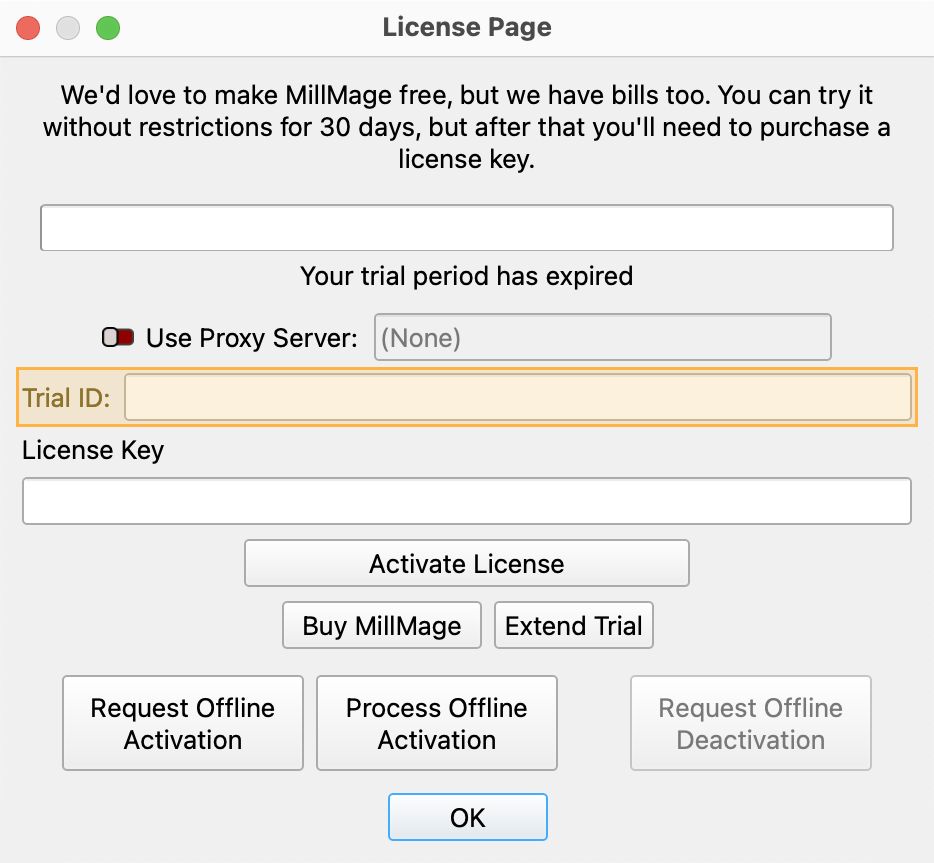
Release Candidate users who see a "Your trial period has expired" notice when opening MillMage can request an extension to the update period by emailing the MillMage Trial ID to the Support team.
Find your Trial ID in the License Management window. Email your Trial ID to [email protected] to start your request. The duration of the extended update period may vary.

Warning
The current version of MillMage is a Release Candidate — a stable version of software that is nearly ready for official release, but in need of additional public testing. Please report any unexpected behavior in the MillMage Software Questions section of our forum, including screenshots and as much detail as possible. Ask hardware compatibility questions in the MillMage Hardware Compatibility section.
Users new to MillMage should follow the Getting Started guide.
Video: How to Use a Release Candidate
This video features our sister software, LightBurn. While there may be slight differences in appearance and layout, the demonstrated processes are similar in MillMage.
Warning
This documentation is in active development and in a prerelease state. These documents are not complete and may include missing pages, broken links, and placeholders. Content is being updated as feedback is reviewed. Your patience is appreciated.
Creating and Importing Artwork
If you've followed along so far, you've installed MillMage, set up your first device profile, connected to your CNC machine, and gotten familiar with the setting up your project and tooling. If you need a breather, we wouldn't blame you — we'll be waiting when you get back.
When you're ready, it's time to dig into the reason you're here: using MillMage to make stuff with your CNC machine. Every machining project requires some sort of artwork to convert into the GCode sent to the machine, and that artwork has to come from somewhere. You can create original graphics directly in MillMage, or import graphics created elsewhere and modify them (or just leave them be).
Creating
There are three tools in the Creation Toolbar that you can use to make original graphics in your Workspace. All three work similarly, with minor differences. As with most MillMage tools, there's a lot we could say about each of them, but we'll stick to brief explanations for now.
Draw Lines
You can use the Draw Lines tool to create custom lines and curves. Select the tool, click in your Workspace to place one end of a line, then drag and click again to place another point, and a line between. Press S to toggle between creating straight lines and curves between points.
Click here to see a full video guide on using the Draw Lines tool
LightBurn Video
This video features our sister software, LightBurn. While there may be slight differences in appearance and layout, the demonstrated processes are similar in MillMage.
Draw Shapes
Click the arrow in the bottom right corner of the Draw Shapes icon to select from a menu of eight different types of shapes. Then click in your Workspace, hold, and drag to set the size of the shape. Release to finish creating it. If you hold Shift while dragging, the shape's width and height will be the same, so you can create perfect circles and squares using the Ellipse and Rectangle options.
Create Text
Click the Create Text icon to enable the tool, then click anywhere in your Workspace and type in the text you'd like to add.
Press Enter while typing your text to jump to a new line and continue typing. Press Esc to finish creating the text.
Importing
We know that many people prefer to design in other software they're already familiar with, or to work from stock artwork.
For that reason, MillMage can Import a variety of file formats:
Vector / mixed formats:
.ai— Adobe Illustrator.svg— Scalable Vector Graphics.dxf— AutoCAD Drawing Exchange Format.pdf— Adobe Portable Document Format.plt/.hpgl— Plotter / Hewlett-Packard Graphics Language
Importing Text
If you import vector files not made in MillMage that contain text, make sure that any fonts used in the file are installed on your computer, or that the text has been converted to paths using whatever tools are available in the other program. MillMage is not able to import embedded fonts. If MillMage is unable to import anything from your file, the status bar will display Nothing Imported.
Different programs use different terms for this process, but terms such as welding, convert to outline, and convert to path are common.
Image formats:
.png— Portable Network Graphics.jpg/.jpeg— Joint Photographic Experts Group format.bmp— Windows Bitmap.gif— Graphics Interchange Format.tif/.tiff— Tagged Image File Format
To import artwork saved in any of the above formats, click the Import button in the Main Toolbar, go to File → Import, or press Ctrl/Cmd+I, then navigate to the location the file is saved on your computer and select it.
Use caution with AI-generated files
If you use AI/LLM tools to generate files, please be aware that the files generated may not conform to standards for the file type you're importing and you may experience failed imports or unexpected results.
Quick Tip: Drag and drop directly into MillMage
Next Steps
For more help using MillMage, please visit our forum to talk with MillMage staff and users, or email support.


