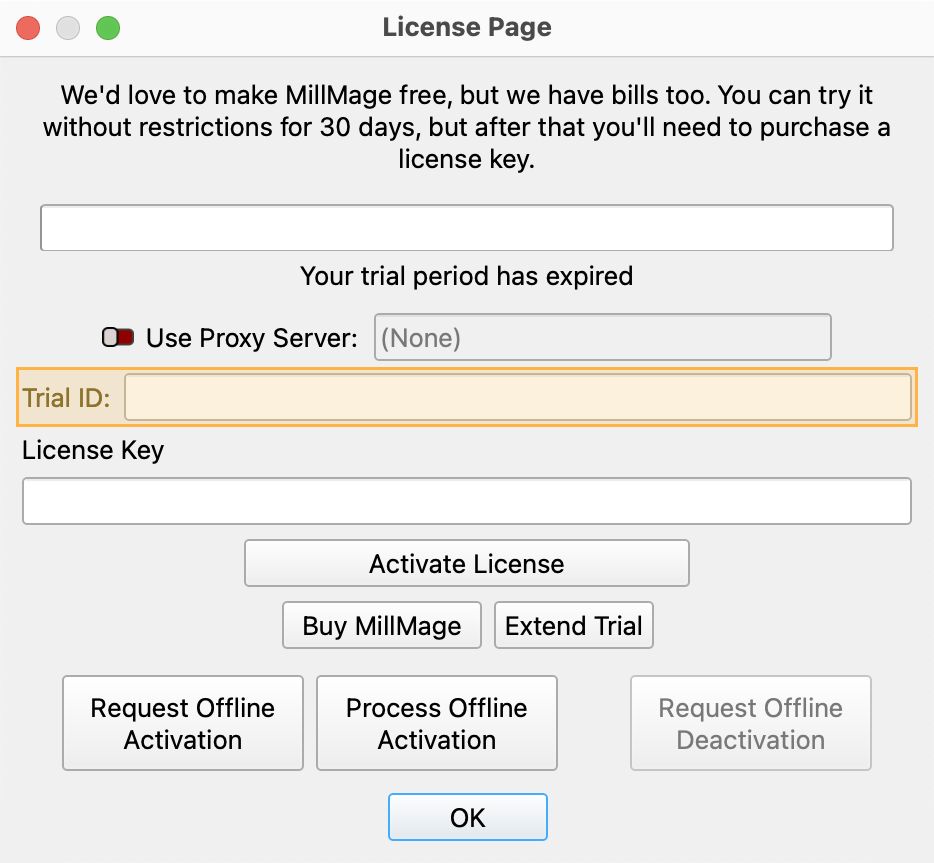
Trial Period or Updates Expiring? Email Trial ID to Support
Thank you for testing MillMage!
Release Candidate users who see a "Your trial period has expired" notice when opening MillMage can request an extension to the update period by emailing the MillMage Trial ID to the Support team.
Find your Trial ID in the License Management window. Email your Trial ID to [email protected] to start your request. The duration of the extended update period may vary.

Warning
The current version of MillMage is a Release Candidate — a stable version of software that is nearly ready for official release, but in need of additional public testing. Please report any unexpected behavior in the MillMage Software Questions section of our forum, including screenshots and as much detail as possible. Ask hardware compatibility questions in the MillMage Hardware Compatibility section.
Users new to MillMage should follow the Getting Started guide.
Video: How to Use a Release Candidate
This video features our sister software, LightBurn. While there may be slight differences in appearance and layout, the demonstrated processes are similar in MillMage.
Warning
This documentation is in active development and in a prerelease state. These documents are not complete and may include missing pages, broken links, and placeholders. Content is being updated as feedback is reviewed. Your patience is appreciated.
Project Setup Window
Quick Reference: Project Setup
-
Location
File → Project Setup Edit
CNC Tools → Project Setup Edit
Define your device-specific setup and the project material stock — or workpiece — dimensions in the Project Setup window. MillMage customizes the Workspace and user interface based on your project parameters and the CNC machine selected in the devices list. The workspace displayed in MillMage will be an approximate representation of the stock material working area used in the project — not the cutting area of the CNC machine.
These project settings can be updated at any time.
Use the Project Setup window to:
- Define material stock dimensions
- Establish the Z Axis zeroing point
- Set the project or design origin
- Select between CNC machines
- Adjust workholding and other parameters
Accessing the Project Setup Window
The Project Setup window will be presented on every launch of MillMage. Conveniently, this instance of the Project Setup window includes a Recent Projects section. Reopen the Project Setup window by selecting either:
Want Help Setting Up Your Project?
Use the Project Setup Wizard for a step-by-step guide on setting up your project.
Device Setup
Define your device-specific setup and the project material in the Project Setup window.
Click within the image below for additional details.
Machine
Select a machine from the Machine drop down.
Follow the Adding a CNC Machine to MillMage guide for a step-by-step walkthrough on adding a CNC machine to MillMage.
Refer to Devices for more information.
Safe Clearance Height
Safe clearance height is the measured distance above all elements of the stock material, high enough for the CNC router tooling or bits to freely move within the workspace without colliding with workholding clamps, fixtures, and fasteners.
Collision Warning
Workholding fixtures are NOT included by default in the Safe Clearance Height. Account for workholding fixture height and add their values into calculations to prevent collisions.
More Information: Workholding
Use Fast Retraction
Fast retraction height is the distance above the material stock to lift the router tooling up when moving between features. This feature is on by default.
Collision Warning
To prevent collisions, only enable fast retraction if the inner area of the material stock is free of clamps, fasteners, and other obstructions.
Pocket Lift Height
Pocket Lift Height is the distance to lift above the pocket surface when moving within a pocket, used to help clear chips and debris.
Units
Set the project units to Millimeters (mm) or Inches (in).
Change the project units of measure at any time by pressing the mm or in button found inbetween the Numeric Edits toolbar and the Text Tools toolbar.
Project Origin
Choose the project origin — also known as the work offset — to set the (0,0) point for the X- and Y-axis on the material workstock in relation to the first imported or drawn artwork. The project origin corresponds to the physical X- and Y-axis point you will home the tip of the router tooling against.
Select Bottom Left or Center for most projects.
Stock Dimensions
Accurately measure the material stock and enter the dimensions in the Width, Depth, and Stock Material Thickness fields.
Ensure that the material stock is securely fastened within the machine workspace before operating the machine.
More Information: Workholding
Zero Point
The Workpiece Zero Point is the point along the up and down Z Axis where the tip of the router bit is physically touching either the top of the material stock, or at the bottom, touching the waste board surface.
Setting the Workpiece Zero Point tells MillMage how to translate the desired cut depths and directions set in the Operations window into the GCode commands needed to perform the final machining operations.
Recent Projects
MillMage will open the Project Setup window at every program launch and will display a list of recent projects as well. Double-click on a file to open that project.
Click on the Open File... button to load MillMage .mage and LightBurn .lbrn2 project files from local storage and connected USB drives.
Related Topics
For more help using MillMage, please visit our forum to talk with MillMage staff and users, or email support.


