Trial Period or Updates Expiring? Email Trial ID to Support
Thank you for testing MillMage!
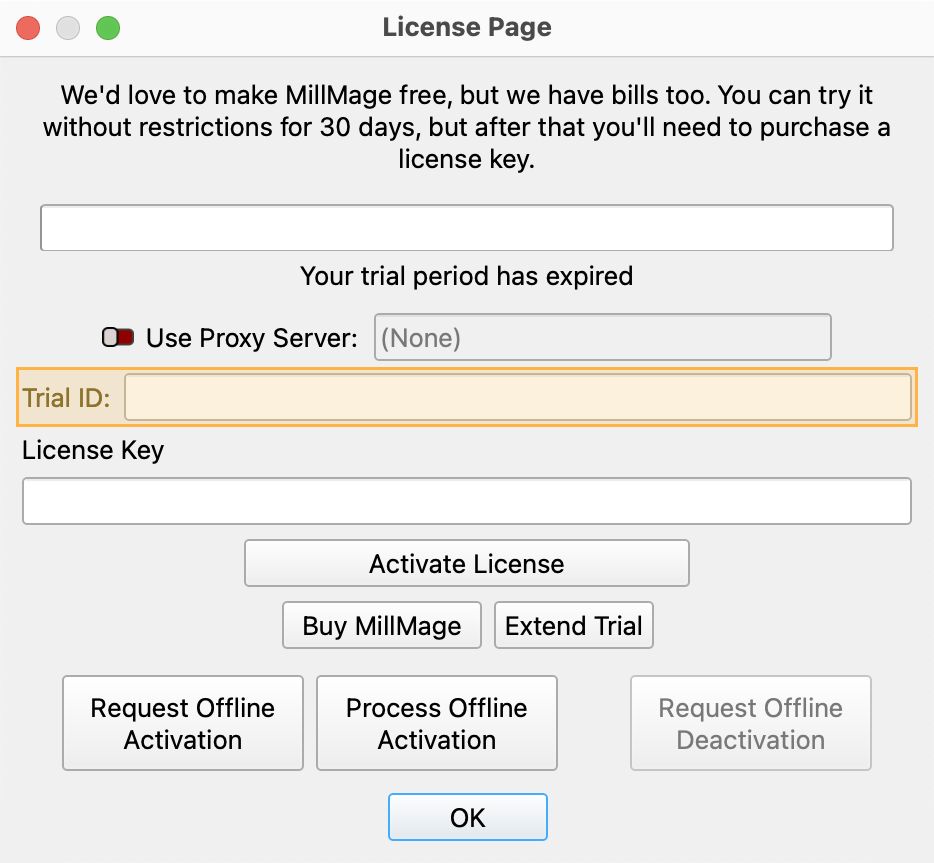
Release Candidate users who see a "Your trial period has expired" notice when opening MillMage can request an extension to the update period by emailing the MillMage Trial ID to the Support team.
Find your Trial ID in the License Management window. Email your Trial ID to [email protected] to start your request. The duration of the extended update period may vary.

Warning
The current version of MillMage is a Release Candidate — a stable version of software that is nearly ready for official release, but in need of additional public testing. Please report any unexpected behavior in the MillMage Software Questions section of our forum, including screenshots and as much detail as possible. Ask hardware compatibility questions in the MillMage Hardware Compatibility section.
Users new to MillMage should follow the Getting Started guide.
Video: How to Use a Release Candidate
This video features our sister software, LightBurn. While there may be slight differences in appearance and layout, the demonstrated processes are similar in MillMage.
Warning
This documentation is in active development and in a prerelease state. These documents are not complete and may include missing pages, broken links, and placeholders. Content is being updated as feedback is reviewed. Your patience is appreciated.
Creation Toolbar
The Creation Toolbar contains tools for selecting, creating, and editing objects.
Accessing the Creation Toolbar
By default, the Creation Toolbar is the upper toolbar on the left-hand side of the screen.
If you have closed the Creation Toolbar, select Window → Creation Tools to re-enable it.
To restore it and all other toolbars and windows to their default positions, go to Window → Reset to Default Layout.
Tip
The layout of MillMage is highly customizable. For more information on enabling and disabling windows and toolbars, or rearranging the default layout, see Customizing the MillMage Window.
Creation Toolbar Options
Click any button in the image below to jump to information on that tool, or scroll down for a list of options and descriptions.
Tip
The Creation Toolbar is normally vertical, but can also be removed from the left-side toolbar and oriented horizontally, as presented above. See Customizing the MillMage Window for more information.
Select
Esc
Objects in MillMage must be selected before they can be modified. With the Select tool active, you can click on objects to select them, or click, hold, and drag to select objects contained or crossed by a selection box.
See Selection for more information.
Draw Lines
Ctrl/Cmd+L
Creates vector paths out of straight and curved lines. With the tool active, click to place points.
See Draw Lines for more information.
Draw Shapes
Creates various types of built-in shapes, including Rectangles, Ellipses, Polygons, and Stars.
Click the arrow in the lower right corner of the icon, or click and hold anywhere on the icon, to open a submenu with indivual shape creation tools.
See Draw Shapes for more information.
Edit Nodes
Ctrl/Cmd+`
Use the Edit Nodes tool to edit the nodes, or points, that make up vector paths. This only works on Ungrouped vector paths.
See Edit Nodes for more information.
Trim Shapes
Ctrl/Cmd+K
Use the Trim Shapes tool to remove sections of vector graphics that lie between intersections.
See Trim Shapes for more information.
Add Tabs
Ctrl/Cmd+Tab
Use Add Tabs to add tabs – small sections of material deliberately left uncut – to your project. Tabs prevent objects from coming free from the base material during cutting.
See Add Tabs for more information.
Warning
Proper use of tabs is essential for preventing objects from flying out of your material at high speeds, resulting in damage to your project, machine, or self.
Create / Edit Text
Ctrl/Cmd+T
Use Create / Edit Text to create or change Text Objects in your design.
See Create and Edit Text for more information.
Measure
Alt/Option+M
With the Measure tool active, hover over an object to see measurements and node information, or click and drag to measure the distance between any two points.
See Measure for more information.
For more help using MillMage, please visit our forum to talk with MillMage staff and users, or email support.
