Trial Period or Updates Expiring? Email Trial ID to Support
Thank you for testing MillMage!
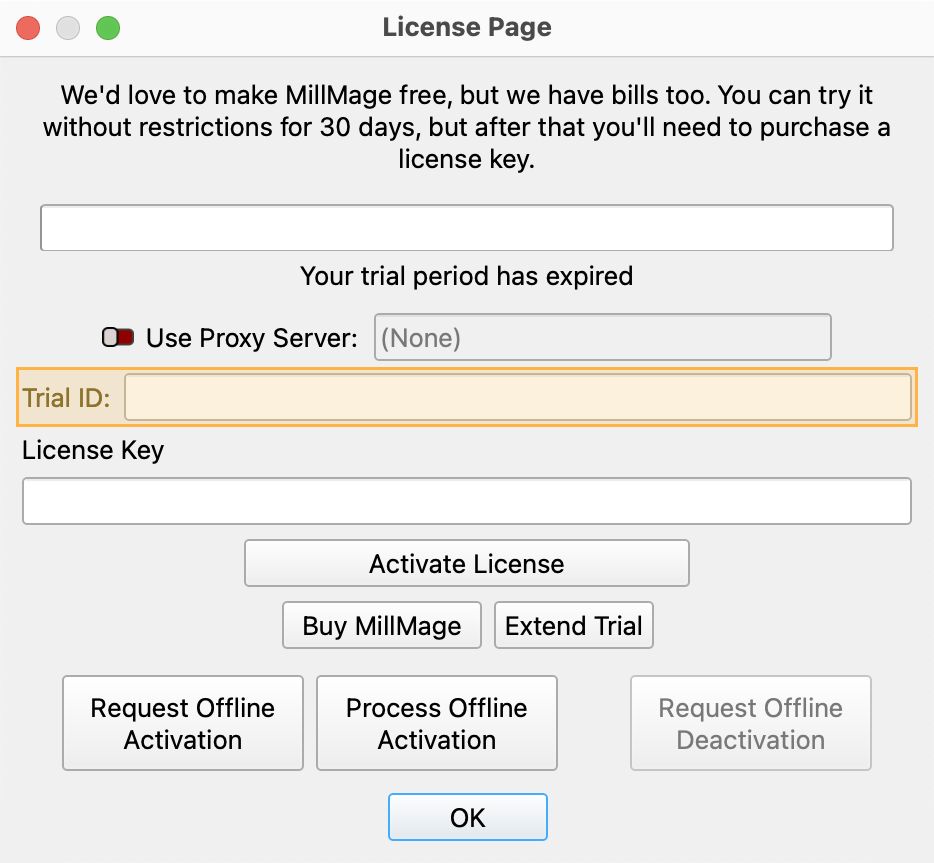
Release Candidate users who see a "Your trial period has expired" notice when opening MillMage can request an extension to the update period by emailing the MillMage Trial ID to the Support team.
Find your Trial ID in the License Management window. Email your Trial ID to [email protected] to start your request. The duration of the extended update period may vary.

Warning
The current version of MillMage is a Release Candidate — a stable version of software that is nearly ready for official release, but in need of additional public testing. Please report any unexpected behavior in the MillMage Software Questions section of our forum, including screenshots and as much detail as possible. Ask hardware compatibility questions in the MillMage Hardware Compatibility section.
Users new to MillMage should follow the Getting Started guide.
Video: How to Use a Release Candidate
This video features our sister software, LightBurn. While there may be slight differences in appearance and layout, the demonstrated processes are similar in MillMage.
Warning
This documentation is in active development and in a prerelease state. These documents are not complete and may include missing pages, broken links, and placeholders. Content is being updated as feedback is reviewed. Your patience is appreciated.
Apply Mask to Image
LightBurn Video
This video features our sister software, LightBurn. While there may be slight differences in appearance and layout, the demonstrated processes are similar in MillMage.
Quick Reference: Apply Mask to Image
-
Location
Tools → Apply Mask to Image
Right-click → Apply Mask to Image
Use Apply Mask to Image to crop or hide portions of images.
By default, image masking doesn't delete the data of the removed part of the image, it just hides it from view.
Tip
You can use masking to remove the background of an image, for example to isolate a pet or person from an photograph.
Masking an Image
In addition to an image, masking requires a vector object, in any desired shape. The vector object must be a closed shape, with a single, shared start and end point
You can use use rectangles to perform standard crops, but the shape can be a more complex path as well, or even a Group of vectors (including text) provided that the Group is all the same color.
To Mask an Image, select the image and vector, then go to Tools → Apply Mask to Image, or right-click the selection and choose Apply Mask to Image from the context menu.
Hidden Vector
If the vector is hidden by the image, use Push to Front to move it forward in the draw order if you're also using a Wireframe View Style.
Removing the Center of an Image
Sometimes, you might want to cut out the inside of an image while leaving the outer portion intact. You can do this by Grouping together nested shapes before masking.
See below for detailed directions and an animation showing the difference in results between masking an image with just a circle or a circle inside of a rectangle.
- Draw the vector shape(s) for what you want to remove.
- Surround the shape(s) you drew with an outer shape. If the outer shape is completely outside of the image you're masking, the outer edges of the image will be unchanged. If the outer shape cuts into the image itself, the part of the image outside of your shape will be removed.
- Group your inner and outer shapes together.
- Select the grouped vectors and the image, and apply a mask by either going to Tools → Apply Mask to Image or right-clicking and choosing Apply Mask to Image from the context menu.
Combining Tracing and Image Masks
Using LightBurn's Trace tool on images with clearly defined edges can be a quick way to produce a mask to remove an unwanted background. In the example below, the donut is traced with Delete Image After Trace disabled, and then the traced shape is used as a mask to hide the background.
Removing a Mask (Restoring an Image)
You can fully restore the original image in two ways:
- Select the vector object you used for the mask and press Backspace/delete on your keyboard to delete it.
- Select the image, right-click it, and choose Remove Mask from Image.
Editing a Mask
To change which parts of the image are revealed and hidden, you can edit the existing mask as you would any other vector object, for example with the Select, Edit Nodes, and Boolean tools.
Grouping
Once you have the mask as you want it, it's a good idea to Group the vector and image to avoid accidentally moving one without the other.
Flattening (Baking-In) a Mask
The downside of preserving the hidden parts of the image is that it can make masked images harder to align to other objects, but it is possible to permanently remove the hidden areas of a masked image (also called "baking in" the mask).
To do so, right-click the masked image and select Flatten Image Mask.
This also removes the masking shape, leaving you with a only an image in the shape it had been masked.
For more help using MillMage, please visit our forum to talk with MillMage staff and users, or email support.


