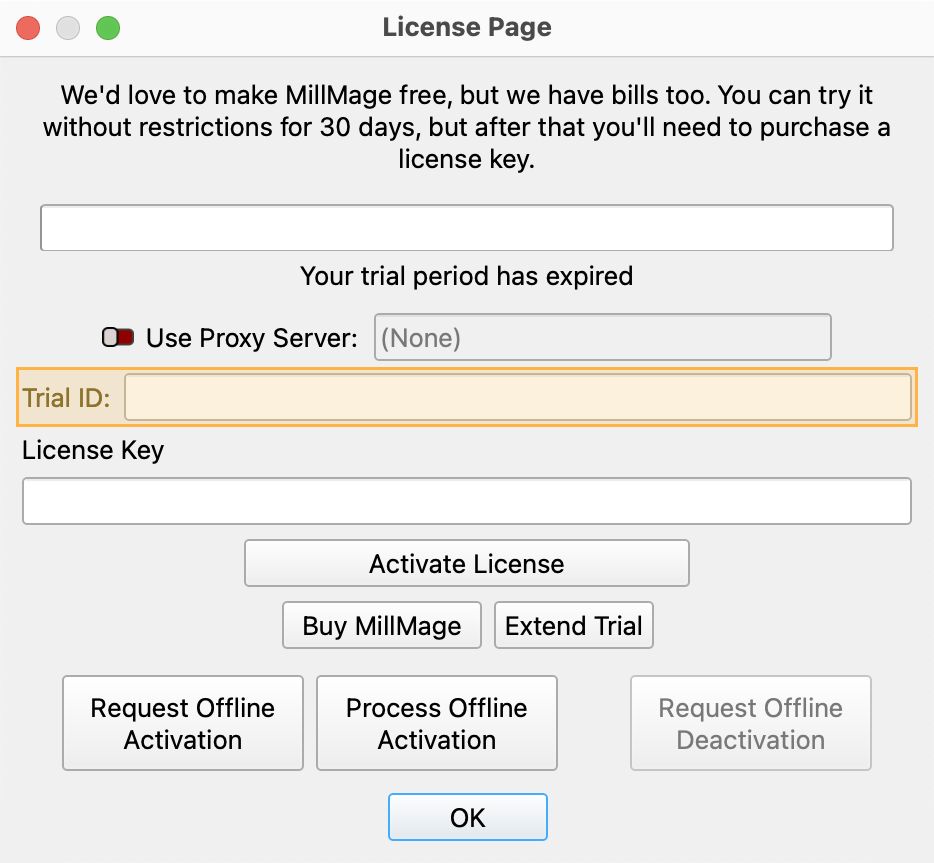
Trial Period or Updates Expiring? Email Trial ID to Support
Thank you for testing MillMage!
Release Candidate users who see a "Your trial period has expired" notice when opening MillMage can request an extension to the update period by emailing the MillMage Trial ID to the Support team.
Find your Trial ID in the License Management window. Email your Trial ID to [email protected] to start your request. The duration of the extended update period may vary.

Warning
The current version of MillMage is a Release Candidate — a stable version of software that is nearly ready for official release, but in need of additional public testing. Please report any unexpected behavior in the MillMage Software Questions section of our forum, including screenshots and as much detail as possible. Ask hardware compatibility questions in the MillMage Hardware Compatibility section.
Users new to MillMage should follow the Getting Started guide.
Video: How to Use a Release Candidate
This video features our sister software, LightBurn. While there may be slight differences in appearance and layout, the demonstrated processes are similar in MillMage.
Warning
This documentation is in active development and in a prerelease state. These documents are not complete and may include missing pages, broken links, and placeholders. Content is being updated as feedback is reviewed. Your patience is appreciated.
Optimize Selected Shapes
Quick Reference: Optimize Selected Shapes
-
Location
Edit → Optimize selected shapes
-
Keyboard Shortcuts
Windows: Alt+Shift+O
Mac: Option+Shift+O
The Optimize Shapes tool simplifies and smooths selected shapes by reducing the node-count or by fitting them to arcs or lines. This is often useful when importing art created in other software, or cleaning up traced artwork.
Using Optimize Shapes
To use Optimize Shapes, select the shapes you want to Optimize, and make sure they're Ungrouped. Go to Edit → Optimize selected shapes or use the shortcut Alt/Option+Shift+O to open the Optimize Shapes window.
Text objects or Primary Shapes must be Converted to Paths in order to Optimize them.
Optimize Shapes Window
The Optimize Shapes tool adjusts selected shapes within a specified error tolerance, which defines the maximum amount the new optimized shapes can deviate from the original source shapes.
Error tolerance is controlled by the sliders beneath each optimization option. Switches next to each option control whether they are enabled or disabled.
Optimizations are visible in your Workspace as you make changes — adjust the tolerance sliders or enable and disable options to see the result of different combinations of tolerances and optimizations.
Press OK to confirm changes and Optimize the source shapes, or Cancel to discard the changes and leave the shapes as they are.
Smooth source shapes
Smooth source shapes smooths out wavy or jagged lines. This is often useful for cleaning up vectors from Image Tracing. Increase the value to strengthen the smoothing effect, at the expense of potentially losing small details or rounding off sharp corners.
Fit shapes to lines
Fit shapes to lines simplifies shapes by turning sections that are close to being a line into lines. This can reduce node count or help clean up graphics with many small or overlapping lines.
Fit shapes to arcs
Fit shapes to arcs simplifies shapes by converting lines into arcs. This can reduce node count or recreate true arcs from software that exports them as many small line segments.
Points, Lines, and Curves
At the bottom of the window, MillMage displays the number of Points (nodes), Lines, and Curves (arcs) in the original shapes and in the optimized versions of the shapes.
Troubleshooting
- If the Optimize selected shapes menu option is grayed out, or the shortcut key doesn't open the Optimize Shapes window, make sure you have at least one object selected.
- If the Optimize Shapes window shows 0 points, 0 lines, and 0 curves, make sure your shapes are Ungrouped and that any Primary Shapes and Text have been Converted to Paths.
Related Topics
For more help using MillMage, please visit our forum to talk with MillMage staff and users, or email support.


