Warning
This documentation is in active development. Content is being updated as feedback is reviewed. Your patience is appreciated.
Submit documentation feedback with the widget at the bottom-left of this window or by emailing [email protected].
Open a support ticket with the widget at the bottom-right or by emailing [email protected].
Quick Nest
Nesting enables you to arrange objects for more efficient material use. MillMage 0.8 offers two options for nesting: Quick Nest, described here, and Nest Selected. Quick Nest has some limitations, which you can read about here.
Use Quick Nest if you:
- Want a fast, easy-to-use, built-in nesting workflow.
- Are okay with slightly less dense nesting in some designs.
Use Nest Selected if you:
- Need to pack parts as tightly as possible, especially with parts that are concave or have complex outlines.
- Are okay with uploading your parts to an online service.
LightBurn Video
This video features our sister software, LightBurn. While there may be slight differences in appearance and layout, the demonstrated processes are similar in MillMage.
Using Quick Nest
You can find Quick Nest in the Docking Toolbar or by going to Arrange → Dock → Nest Selected.
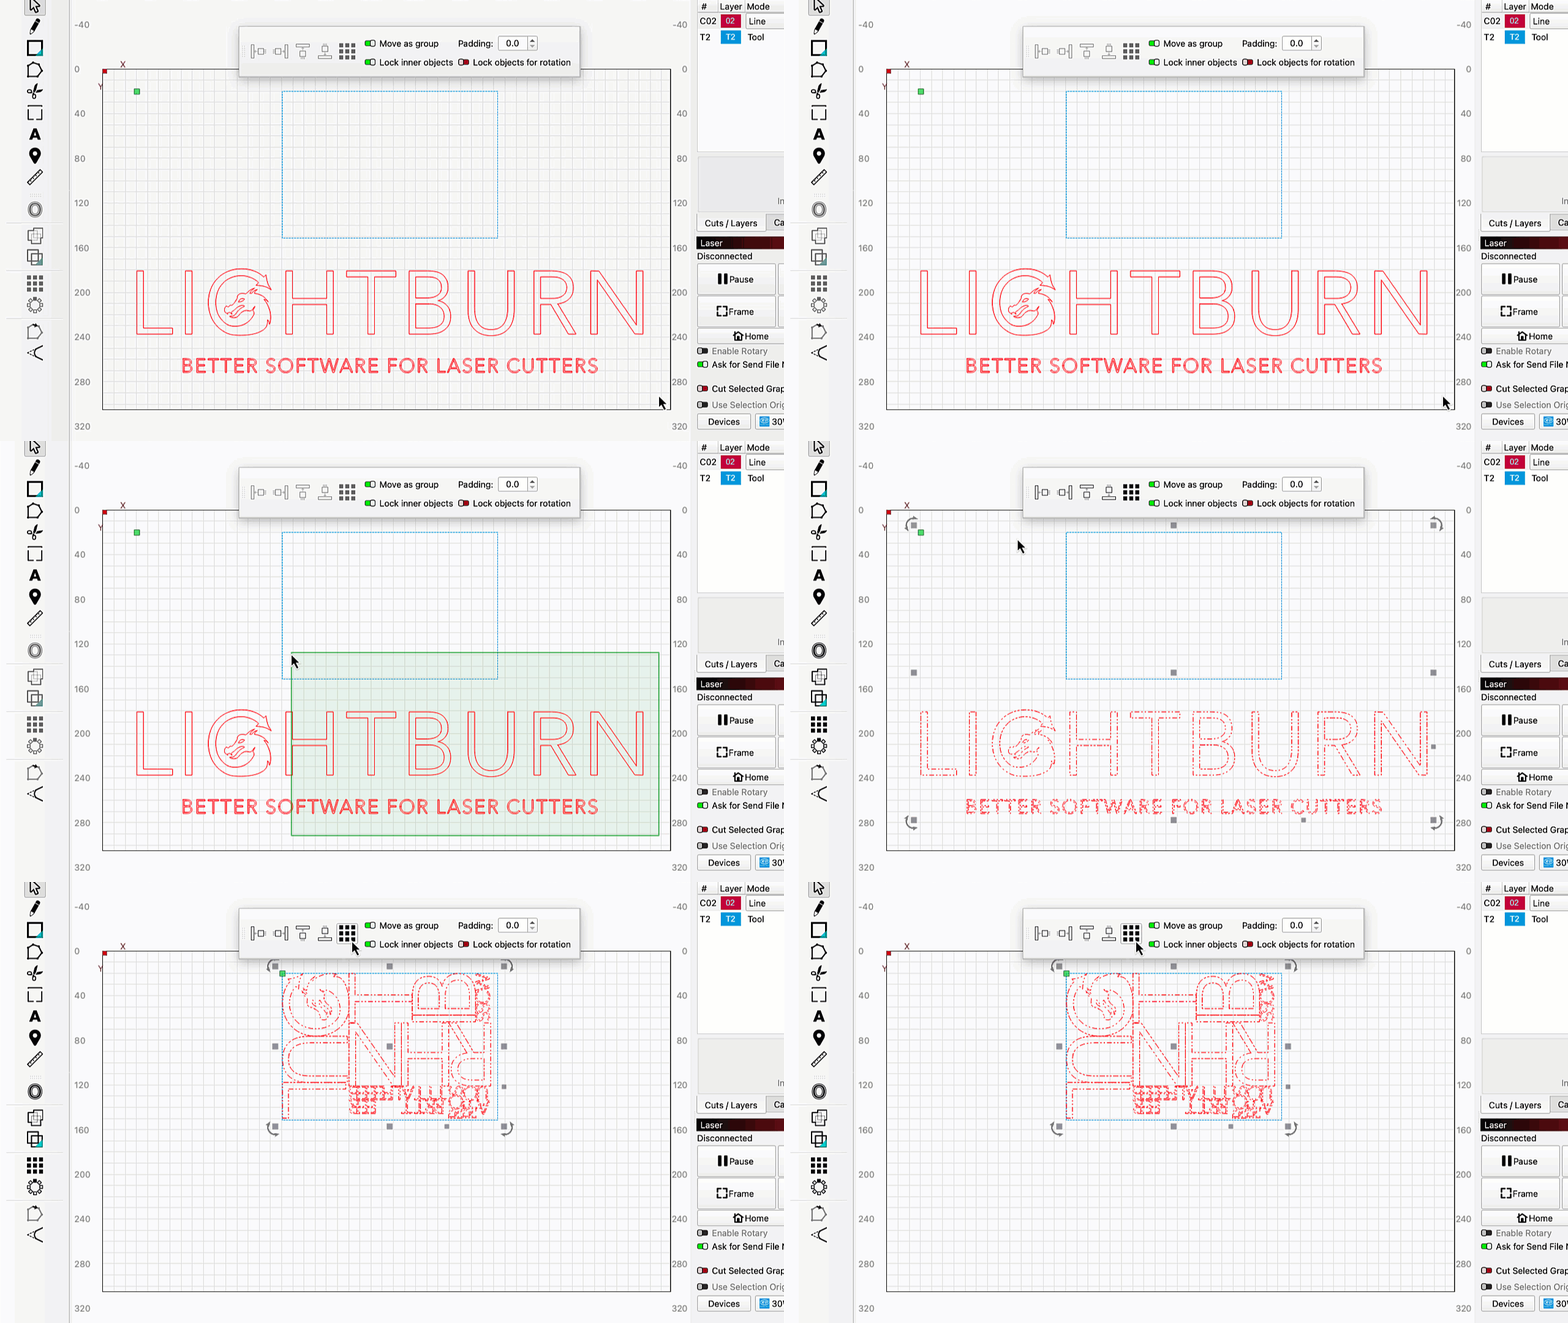
To use Quick Nest:
- Create a rectangle to use as a container for the shapes you want to nest.
- Select the container and all of the objects you want to nest.
- Adjust settings in the Docking Toolbar, if desired.
- Select Quick Nest.
- If you want, you can run Quick Nest multiple times to potentially get different layouts.
Nesting More Objects Than Fit the Bounding Box
If you're using Quick Nest with more objects than can fit in the selected bounding box, MillMage will automatically create additional bounding boxes matching the dimensions of the original to fit all of your objects. Further improvements to this, along with additional controls, will be coming in the next release of MillMage.
Quick Nest Settings
Move as Group
Enable this to move all objects as a single group.
Lock Inner Objects
Enable this to ensure that inner objects move with the objects surrounding them, whether or not they're grouped. In the demonstration at the top of the page, Lock Inner Objects kept the inner shapes of the letters and the dragon's eye in place while nesting without having to group them.
Lock Objects For Rotation
Enable this to lock the rotation of objects being nested. Disable this to allow Quick Nest to rotate the objects as part of the nesting process.
Allowing rotation can improve material usage, but may not work well for all designs, particularly when cutting parts from material with a visible grain.
Padding
Use Padding to set the minimum distance between parts. The number is in either millimeters or inches, depending on your Design Units.
Edge Buffer
Use the Buffer setting to leave a gap between the edge of the page and the nested parts.
Quick Nest Limitations
Quick Nest uses bounding box nesting. It defines each object by the bounding box, or smallest possible rectangle that can fully contain it, and then packs those bounding boxes as tightly as possible into the container you choose.
The great thing about Quick Nest is that it's fast, convenient, and powerful enough for most use cases. However, because it nests according to the bounding box and not the actual shape, complex shapes can't nest into each other as densely as a full nesting solution.
If you have complex shapes and need the absolute densest possible packing, you may want to check out Nest Selected, which automates the process of exporting your shapes to nest with SVGnest.com and re-importing those shapes back into MillMage.
Quick Nest Errors
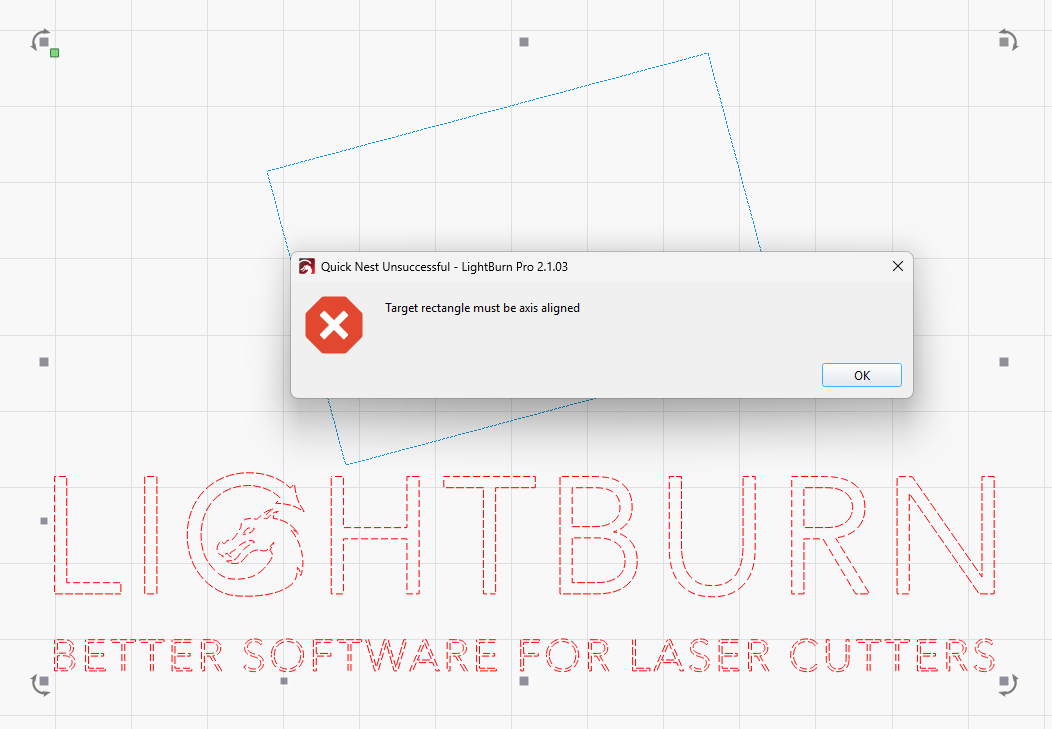
Target Rectangle Must be Axis Aligned
To use Quick Nest, the rectangle you're nesting into must have sides that are straight up and down and sideways.
If you get this error, make sure your bounding box is a rectangle and that it's not at an angle.
Select a Target Rectangle to Nest Into
If you get this error message, MillMage doesn't see a selected rectangle to use as a container.
Fix the error by selecting a rectangle to arrange your parts inside of in addition to the parts to be nested. In the example below, the blue rectangle wasn't selected, so MillMage has nothing to nest the parts into.
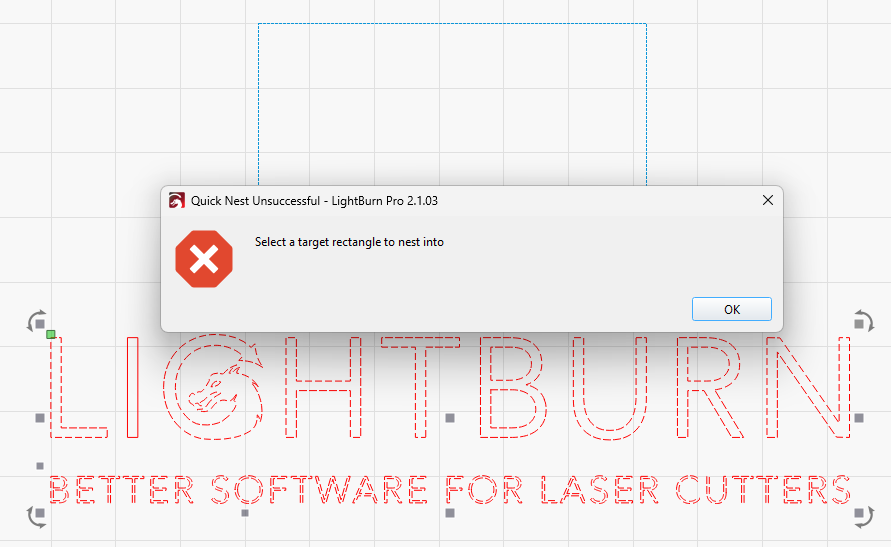
Why is the I in LightBurn not selected?
In the screenshot above, the letter I in LightBurn isn't selected, because selecting it and not the larger blue box results in a different error. The reason for this is a bit technical, but if you're interested, keep reading.
The letters used in the demo file here are actually paths, not text objects, and the letter I would be a valid rectangle to nest into if it were big enough. This isn't a problem when the larger blue rectangle is selected, but when I don't select that rectangle, Quick Nest tries to nest into the I. This actually could have resulted in one of two different error messages:
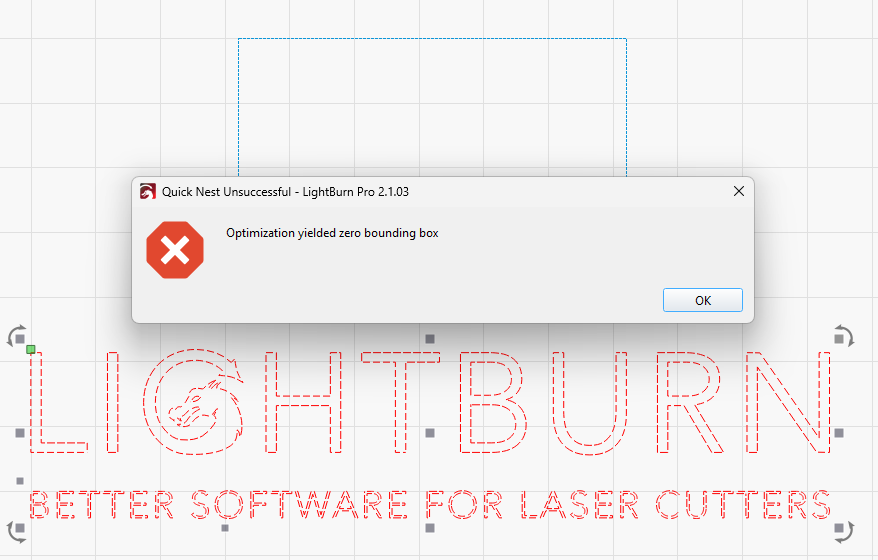
- Optimization Yielded Zero Bounding Box: If none of the shapes selected are small enough to nest inside the I, Quick Nest will be unable to create a suitable arrangement and you will receive this error.
- Some Objects Remain Un-Nested: If there are shapes small enough to be nested into the I, Quick Nest will nest the objects it can, and you will receive this error.
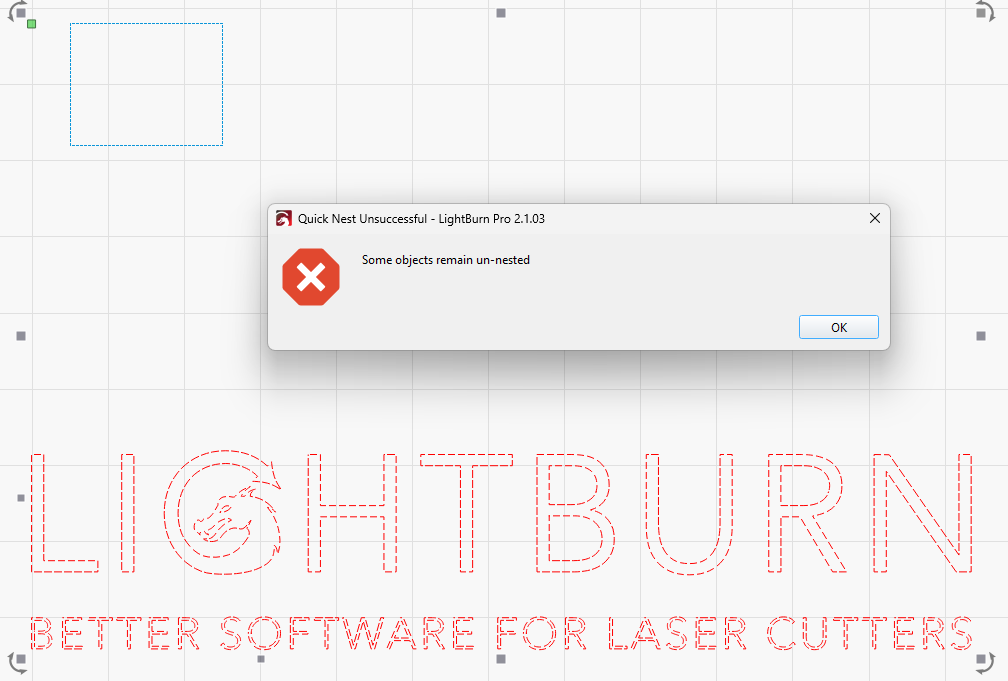
Some Objects Remain Un-Nested
If you get this error message, one or more of the parts you're trying to nest are to big to nest in your selected rectangle with the current settings.
When you press OK, MillMage will still nest as many of the parts as possible, leaving out the ones that can't be nested. If your target rectangle is big enough to nest your largest part, you will not see this error message.
Optimization Yielded Zero Bounding Box
If you get this error message, it means Quick Nest is unable to create a suitable arrangement at all.
In certain circumstances, if you don't select a rectangle to nest into you can get this error message instead of Select a Target Rectangle to Nest Into. In the screenshot below, the blue rectangle isn't selected, but the red I, which is actually a rectangle, is selected. Quick Nest tries to nest into the I and fails, resulting in the Zero Bounding Box error. More about how this happens.
Related Topics
For more help using MillMage, please visit our forum to talk with MillMage staff and users, or email support.