Warning
This documentation is in active development. Content is being updated as feedback is reviewed. Your patience is appreciated.
Submit documentation feedback with the widget at the bottom-left of this window or by emailing [email protected].
Open a support ticket with the widget at the bottom-right or by emailing [email protected].
Radius / Fillet
Quick Reference: Radius/Fillet
-
Rounds over sharp corners, takes a round bite out of a corner, or removes an existing radius.
-
Location
Use the Radius Tool to fillet (round over) sharp corners, take a round bite out of an inside corner to allow for box joints, or turn a radius back into a sharp corner (remove a radius).
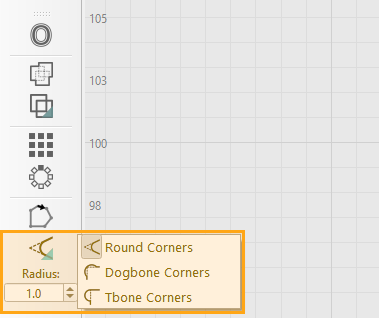
Types of Radii
You can use Radiuses to:
- Round out corners for a softer appearance
- Round out corners of tabs, to enable easy assembly with Dogbone and T-bone radii
- Create smooth transitions between sharp lines
- Form more complex shapes (varying sizes and types)
- Add rounded details to projects
Using the Radius Tool
You can apply a radius to any corner node of any Ungrouped path or Primary Shape, provided that the lines on either side of the node can accommodate the size of the radius. Radiuses can be applied to text if you first convert it to paths.
Add a Radius to a Path
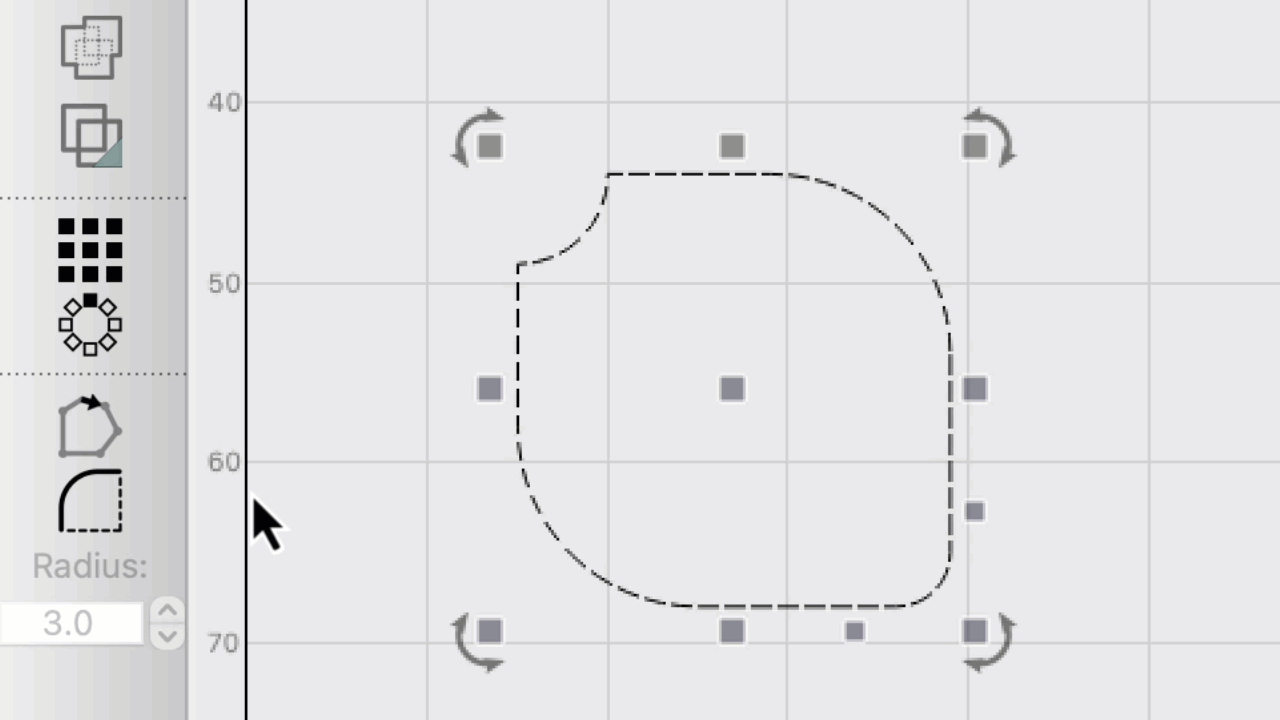
To add a radius, first click the Radius Tool icon in the Modifiers Toolbar.
Set the radius value to the size of the radius you wish to create — there must be enough room between the corner and nearby points to accommodate this value.
If you change the radius to a negative number it takes a little bite out of the corner.
Select the object you want to modify, and click on a corner to apply the radius.
To exit the Radius Tool, press Esc on your keyboard.
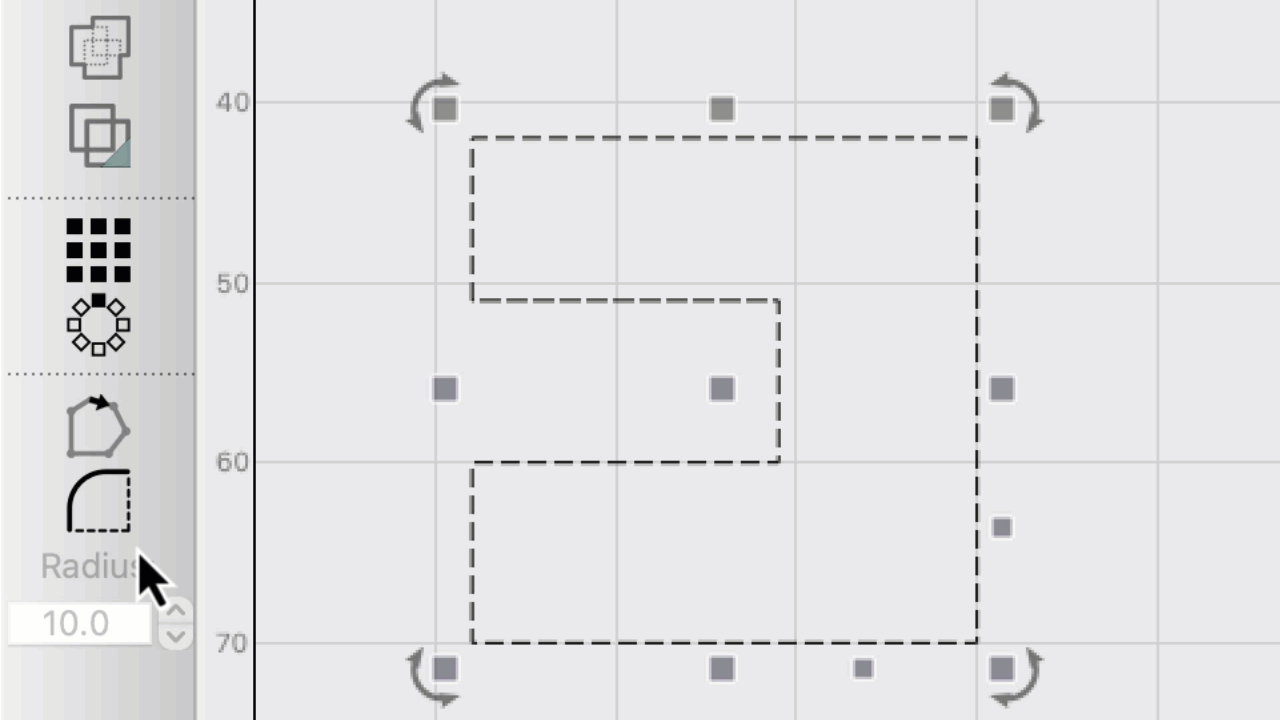
When the Radius Tool is active, the icon changes as you hover over a corner to indicate whether the Radius Tool can be used. If it can't be used, the cursor will change to indicate that there is not enough space.
LightBurn Video
This video features our sister software, LightBurn. While there may be slight differences in appearance and layout, the demonstrated processes are similar in MillMage.
| Icon | Meaning |
|---|---|
| Click to fillet corner | |
| Click to remove fillet | |
| Can't fillet — not enough space | |
| Too close to existing curves |
Remove or Change a Radius
You can also use the Radius Tool to remove rounded corners (returning them to a sharp one) by clicking on them. This even works on imported designs that were made in different software, as long as the software exported actual arcs.
After removing a radius, you can then apply a differently-sized one to the corner, as normal.
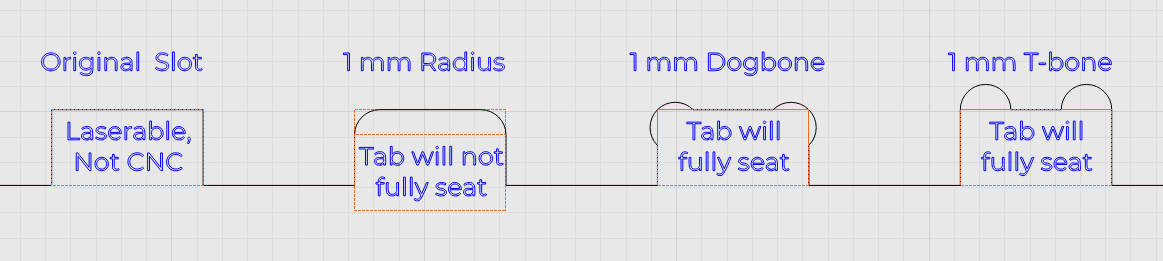
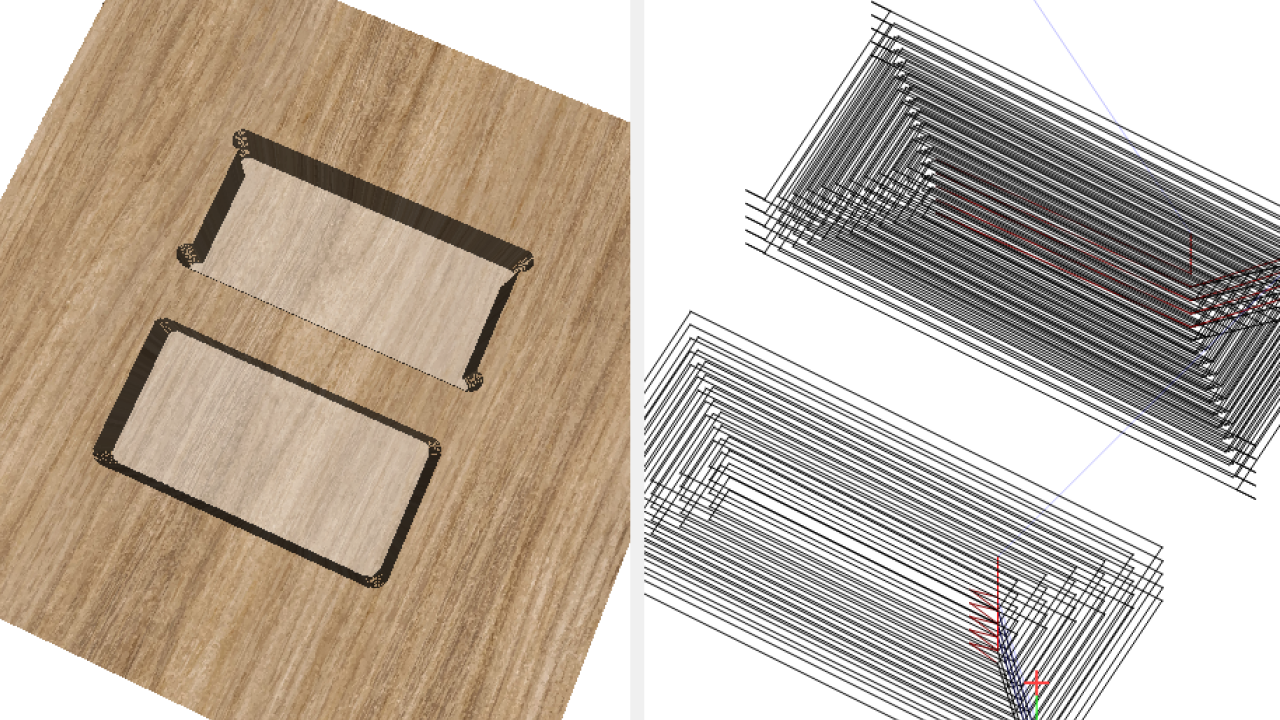
Adding a Dogbone or T-bone to a Box Joint Slot
CNC routers use round tooling and cannot create sharp internal corners. Add Dogbones or T-bones to the inside corners of slots to be able to fully seat rectangular box joint tabs.
Use the Dogbone Slot operation to create Dogbones and T-bones in rectangular shaped pockets automatically without modifying project geometry.
Learn more about the Dogbone Slot Operation here: Dogbone Slot Operation →
Dogbone & T-bone Tooling Diameter:Radii Ratio
Set your Dogbone radius to one-half of the tool diameter — for example, a 2 mm end mill works well to create a strong joint with a 1 mm Dogbone/T-bone. In general, the installed tooling radius is the maximum radius size for Dogbone/T-bone corners.
Adding a Radius to a Rectangle
Assign Rectangles to Dogbone and T-bone Pocket Operations
Use the Dogbone Slot Pocket Operation to Create Dogbone and T-bone Pockets
The Dogbone Slot is a special operation for rectangular pockets that does not change the original project geometry and instead creates clearance for slot and tab joinery.
Learn more about the Dogbone Slot Operation here: Dogbone Slot Operation →
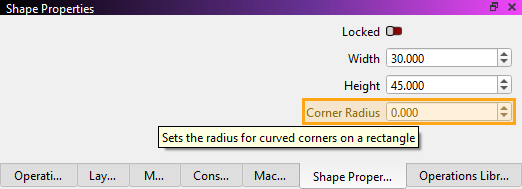
Specify Radii Per Shape
You can apply radiuses to Rectangles in the Shape Properties Window. This method has the advantage that resizing the rectangle won't change the size of the radius, allowing you to maintain consistency in a design.
Apply Radii Interactively
 Rectangles also have a handle that acts as a shortcut for the Radius value. With a Rectangle selected, hold Ctrl / Cmd, and a blue corner radius control will appear. Drag the blue handle away from the corner to increase the radius of all four corners, and drag back toward the corner to decrease it. Dragging vertically creates a reversed radius, with a bite taken out of the corner.
Troubleshooting
-
The Radius Tool cannot be used with Grouped shapes. Ungroup any shapes you'd like to apply a radius to.
-
If the cursor isn't appearing as you hover over a corner, make sure you've selected the Radius Tool in the Modifiers Toolbar. The Radius icon should be highlighted. Also check that you have selected the object you wish to edit by clicking on it.
-
Radiuses can only be applied where there is room for the radius to be applied. If you see the following icon, it means there is not enough room:

-
If a radius still can't be applied, it might be because the two lines that make up the corner aren't actually joined at that point. To check, move the corner using the Edit Nodes tool. If it splits off into two lines, bring the one you moved back toward the other so that they snap together and join, and then try the radius again.
-
If you are having trouble converting a rounded corner back into a sharp one, it could be because there is not a true arc at the corner. This is most common with imported shapes, because some programs export arcs as a series of tiny lines. You can try recovering the arcs with Optimize Selected Shapes.
Related Topics
For more help using MillMage, please visit our forum to talk with MillMage staff and users, or email support.